Move Out Cleaning: A Practical, Room-by-Room Approach for a Stress-Free Exit
Move out cleaning is one of those tasks that looks simple at first and then quickly turns into a long checklist of hidden dust, grease, stains, and overlooked corners. Whether you are leaving an apartment, a rental house, a condo, or a shared property, a proper move out cleaning can make a major difference in how smoothly the handover goes. It can help tenants protect their deposit, support landlords preparing a property for new occupants, and save everyone time during the final inspection.
What makes move out cleaning different from everyday tidying is the level of detail. A quick wipe-down may make a space look acceptable at a glance, but a true move out cleaning service focuses on the areas that get checked most carefully: baseboards, appliances, cabinets, bathrooms, floors, and often forgotten spots like vent covers and light fixtures. If you want the property to look its best, it pays to clean with a strategy.
In this article, we’ll look at what move out cleaning involves, why it matters, what rooms need the most attention, and how to build an efficient process that leaves the property in excellent condition. If you are preparing to move soon, this is the kind of practical information that can save you stress, time, and unnecessary re-cleaning.
Why Move Out Cleaning Matters
A thorough move out cleaning is not just about appearances. It often affects financial outcomes, property turnover speed, and the impression left behind for the next resident. Many lease agreements require tenants to return the property in a reasonably clean condition, and some include detailed expectations for carpet cleaning, appliance care, or wall spot removal. When those expectations are not met, deductions can follow.
For landlords and property managers, move out cleaning is equally important because it supports a faster transition between occupants. A clean, fresh-smelling property photographs better, shows better, and can often be listed or rented more quickly. Even in owner-occupied homes, this cleaning process is useful before selling a property because buyers notice cleanliness immediately.
Another benefit of professional-level move out cleaning is peace of mind. Moving already involves packing, address changes, utility transfers, and logistics. By cleaning methodically, you reduce the chance of last-minute surprises during inspection day. That is why many people choose either to handle the work in stages or book a reliable service and let experts take over the heavy lifting.
Key Reasons People Invest in Move Out Cleaning
- To help secure a full security deposit return
- To meet lease or contract cleaning requirements
- To present the property in the best possible condition
- To reduce stress during moving week
- To prepare the home for sale, rent, or immediate occupancy
What a Move Out Cleaning Typically Includes
Not every property needs the exact same level of care, but a strong move out cleaning checklist usually covers every major living area. The goal is to remove visible dirt and buildup, restore surfaces as much as possible, and make the home feel ready for the next person. That means more than vacuuming floors and taking out the trash.
At minimum, move out cleaning should involve dusting and wiping all accessible surfaces, cleaning kitchen appliances inside and out, scrubbing bathrooms, removing cobwebs, washing floors, and addressing grime around fixtures and fittings. If time allows, detail work like cleaning window tracks, door frames, and behind appliances can improve the final result even more.
Many people underestimate how much difference detail work makes. A property can look clean from the doorway but still fail inspection because of sticky cabinet shelves, soap residue in the shower, or grease under the stovetop. That is why an organized move out cleaning service often follows a room-by-room process instead of jumping randomly from task to task.
Main Areas Usually Covered
- Kitchen: countertops, sink, stove, oven, fridge, cabinets, backsplash
- Bathrooms: toilets, sinks, tubs, showers, mirrors, tile, fixtures
- Living spaces: dusting, floors, vents, baseboards, windowsills
- Bedrooms: closets, shelves, corners, light switches, flooring
- Entryways and hallways: marks on walls, doors, flooring, trim
How to Prepare Before You Start Cleaning
Before the actual move out cleaning begins, a little preparation can make the job faster and far less frustrating. Start by removing all personal items, packing materials, trash, and any food left in cabinets or the fridge. Cleaning around belongings wastes time and usually leaves hidden dirt behind. A completely cleared space is always easier to clean properly.
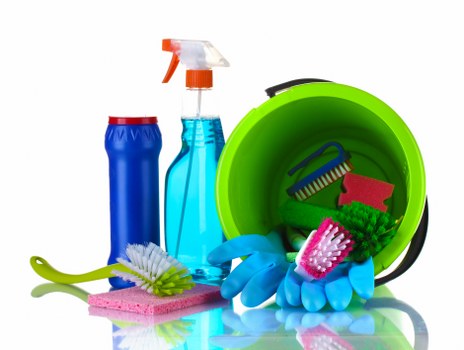
Next, gather the right tools. Basic supplies usually include microfiber cloths, a vacuum cleaner, a mop, a broom, an all-purpose cleaner, a bathroom cleaner, glass cleaner, degreaser, sponges, scrub brushes, and gloves. If the property has carpets, you may also need a carpet stain remover or a steam cleaner. Having everything ready before you begin is a major time-saver.
It also helps to open windows if possible for airflow, especially when using stronger cleaning products. Good ventilation can make the process more comfortable and support faster drying times. If you are handling a full move out cleaning in one day, consider working from top to bottom and from the farthest room back toward the exit so you are not re-cleaning areas you already finished.
Simple Pre-Cleaning Checklist
- Remove all personal belongings
- Discard trash and recyclables
- Disconnect small appliances and electronics
- Gather supplies and protective gear
- Inspect the property for damage or problem areas
Kitchen Move Out Cleaning: The Area That Needs the Most Attention

The kitchen is usually the most demanding part of any move out cleaning project. It collects grease, food residue, stains, and odors, and it often contains several surfaces that need to be cleaned separately. The stove, oven, refrigerator, cabinets, countertops, sink, and floors all deserve focused attention. Even a small kitchen can take longer than expected if grease has built up over time.
Start with the appliances. Remove shelves and drawers from the refrigerator, wipe the interior, and clean the exterior handles and sides. For the oven, use an appropriate degreaser or oven cleaner according to the manufacturer’s instructions. The stovetop should be cleared of burnt-on food, while the range hood and filters often need a deep wipe because they trap grease and dust.
Cabinets and drawers should be emptied, vacuumed, and wiped inside and out. Check the underside of shelves and corners for crumbs, sticky spots, or old spills. Countertops should be cleaned carefully based on the material, and the sink should be scrubbed to remove mineral buildup or stains. A complete move out cleaning of the kitchen also includes the floor under and around appliances if they can be moved safely.
Kitchen Tasks That Often Get Missed
- Inside and behind the refrigerator
- Oven racks and door glass
- Inside microwave and ventilation fan
- Cabinet tops and handles
- Baseboards near cooking areas
- Light switches and backsplash grout
For stronger results, work from the ceiling downward. Clean light fixtures, then cabinets, then counters, then appliances, and finish with the floor. This prevents dust and debris from falling onto surfaces you already cleaned.
Bathroom Move Out Cleaning for a Fresh, Inspection-Ready Finish

Bathrooms are another high-priority zone during move out cleaning. They contain moisture, soap residue, toothpaste splatter, grime around fixtures, and often hard-water marks. Because of this, bathrooms need detailed cleaning rather than a quick wipe. A spotless bathroom can dramatically improve the overall impression of the property.
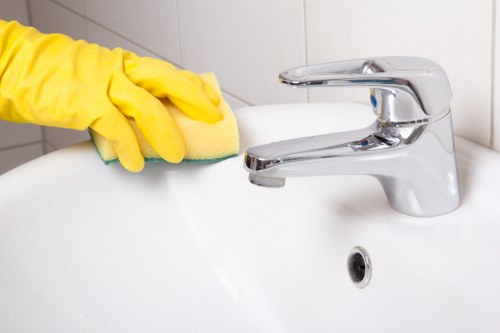
Begin with the toilet, using a disinfecting cleaner on the seat, lid, base, tank, and surrounding floor area. Next, move to the sink, faucet, mirror, and vanity. Shower walls, tubs, doors, and tile grout may need scrubbing to remove soap scum and mildew. If there is mold present, address it safely and properly with the correct product for the surface.
Do not forget the small details that make a big difference: towel bars, toilet paper holders, vents, cabinet fronts, and the area behind the toilet. These overlooked spaces are often what separate basic cleaning from a true move out cleaning result. Finish by disinfecting high-touch points and mopping the floor thoroughly.
Bathroom Focus Areas
- Toilet base and behind the toilet
- Shower doors, tracks, and grout lines
- Mirror edges and faucet handles
- Cabinet interiors and under-sink storage
- Vents, corners, and light fixtures
If water stains or soap buildup are stubborn, allow cleaning products to sit for a few minutes before scrubbing. This simple pause often makes the work much easier and improves the final finish.
Living Room, Bedrooms, and Hallway Cleaning
Although these spaces are often less greasy or stained than the kitchen and bathroom, they still matter in any move out cleaning plan. Living rooms, bedrooms, and hallways usually reveal dust buildup, scuffs, fingerprints, pet hair, and overlooked corners. Clean floors and fresh surfaces in these areas create a polished look throughout the property.
Start by dusting shelves, ledges, ceiling fans, baseboards, blinds, and window sills. Then wipe doors, handles, light switches, and any built-in storage. Closets should be emptied, vacuumed, and checked for dust on shelves and rods. If the home has carpet, vacuum slowly and in multiple directions to lift embedded debris. For hard floors, use the appropriate mop method based on material.
Hallways and entry points deserve special attention because they are heavily visible during inspections and open houses. Scuffed walls, dirty trim, and dusty corners can create the impression that the rest of the home was not cleaned thoroughly. A complete move out cleaning routine should treat these transition spaces as important, not secondary.
Bedroom and Living Space Cleaning Tips
- Remove dust from ceiling fan blades and light fittings
- Clean inside closets and storage areas
- Vacuum corners, under beds, and along edges
- Wipe fingerprints from doors and switches
- Spot-clean marks on walls where allowed
Floor Care and Final Surface Detailing
Floors often determine whether a property feels truly finished after move out cleaning. Clean floors tie the whole process together, while dirty edges, crumbs, or streaks can make the entire home feel neglected. The best method depends on the flooring type, but the principle stays the same: remove debris first, then clean with the right product, and finish with attention to corners and edges.
For carpets, vacuum thoroughly and address visible stains as early as possible. In some cases, professional carpet cleaning may be worth considering, especially if the lease requires it or if the carpet has heavy traffic marks. Hardwood, tile, laminate, and vinyl each need their own care routine. Using too much water or the wrong chemical can damage the finish, so always check what is safe for the surface.
Once the floors are complete, do a final pass on nearby baseboards, thresholds, and door frames. These small details are easy to miss but visible during inspection. This finishing stage is one of the reasons a strong move out cleaning stands out from ordinary housekeeping. It reflects an extra level of care and professionalism.
Floor Cleaning Priorities
- Sweep or vacuum all rooms first
- Treat spots and stains as needed
- Mop or deep-clean by flooring type
- Clean edges, corners, and under appliances
- Allow sufficient drying time before final walkthrough
When to Consider Professional Move Out Cleaning
Some people handle move out cleaning themselves, while others hire professionals because of time, physical effort, or the condition of the property. If the home is large, heavily used, or already behind on routine cleaning, bringing in a professional team can be a smart investment. It can also help if you are balancing move logistics, family responsibilities, or a tight deadline.
Professional cleaners often work faster because they follow efficient systems and use specialized equipment. They can tackle stubborn buildup, high surfaces, and detailed tasks more effectively than many DIY efforts. If you are not sure whether to do it yourself, consider the time available, the size of the property, and the standard expected by your landlord, buyer, or property manager.
Another benefit of a professional move out cleaning service is consistency. When a team is used to cleaning rental properties and vacated homes, they know where dust hides, where grease settles, and which areas typically get checked during final walkthroughs. That experience can make a noticeable difference in the finished result.
Signs You May Want Help
- You have limited time before move-out day
- The property needs deep cleaning rather than surface cleaning
- There are stubborn stains, grease, or mildew issues
- You want a more inspection-ready finish
- You need to focus on packing and relocation tasks
If you want the process handled efficiently and with less stress, contact us today to learn more about available options or book your service now.
Common Move Out Cleaning Mistakes to Avoid
Even with good intentions, many people make avoidable mistakes during move out cleaning. One common issue is cleaning too late, after all the boxes are gone and time is already short. Another is focusing only on visible areas and ignoring the places most likely to be inspected closely. A rushed cleaning job can leave behind dust, residue, and odors that are easy to detect.
Using the wrong products is another concern. Harsh chemicals can damage delicate materials, while weak cleaners may not cut through grease or soap buildup. It is also a mistake to skip ventilation, especially when using strong cleaning agents. In addition, people sometimes forget to test appliances, flush toilets, or check that all trash has been removed before leaving the property.
The best way to avoid these problems is to create a clear plan and work in stages. A careful move out cleaning process leaves less room for errors and makes it easier to catch issues before the final walkthrough. When in doubt, slow down, check your checklist, and repeat any areas that still look dull or dirty.
Frequent Errors
- Waiting until the last minute
- Ignoring corners, edges, and behind appliances
- Using incorrect cleaning products
- Leaving streaks on glass and mirrors
- Forgetting closets, vents, and baseboards
How Move Out Cleaning Supports a Better Handover
A well-executed move out cleaning helps create a smoother transition for everyone involved. Tenants leave with greater confidence, landlords receive a property that is easier to re-rent, and new occupants enter a cleaner, more welcoming space. The process is not only practical but also respectful. It shows care for the property and consideration for the next person who will live there.
When you approach the job room by room, with attention to detail and the right products, the whole experience becomes more manageable. Instead of feeling overwhelmed by the idea of cleaning an entire home, you can focus on one area at a time and steadily work toward completion. That mindset is especially helpful during a stressful move, when every hour counts.
Ultimately, move out cleaning is about leaving the property in strong condition and avoiding unnecessary complications. Whether you do it yourself or hire help, the goal is the same: a clean, organized, ready-to-pass-on home that looks and feels cared for.
Final Cleaning Priorities Before Leaving
- Do a final walkthrough in every room
- Check floors, counters, and fixtures one last time
- Remove all trash and leftover items
- Confirm appliances, lights, and taps are off
- Lock the property and return keys as required
If you are preparing for a move soon and want a cleaner, easier exit, now is the right time to act. A smart move out cleaning plan can reduce stress, improve results, and make your handover far more successful. Book your service now or take the first step toward a spotless move-out today.